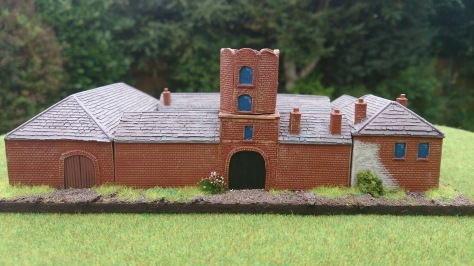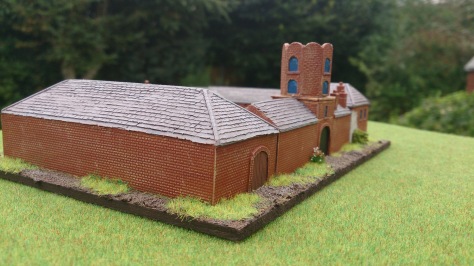
Following on from my “teaser post” of Leven Miniature’s Papelotte model, I thought that a walk-through of how I painted it might be useful to people. Mick asked me to paint this model after seeing the pictures of my version of his La Haye Sainte model, and I was truly honoured that he asked me to do this as I’ve never been invited to do anything like this before! Papelotte farm from Waterloo is one of several iconic farms that were important during the battle. I hope that this guide of how I tackled the project is helpful to people.
Firstly, I cleaned the buildings with warm soapy water and a toothbrush. Mick’s models are usually very clean, but this is a good idea to do with most resin models in case of any residual releasing agent.
Frustratingly for Mick, the prototype that he sent me for painting had a tiny air bubble trapped under the surface of the farmhouse. This produced a very small bulge under the surface. Being the consummate professional that he is, Mick decided to completely remake the production mould in order to deal with this! In order to hide it on the prototype I decided to add a render-effect to some of the farmhouse. In order to do this I used two coats of Games Workshop Liquid Green Stuff. I tend to avoid a lot of GW products nowadays, but I still find their paints and brushes to be very good.

Once the Green Stuff had set, I undercoated all of the buildings using Halford’s Grey Primer. I’ve previously painted from white and black undercoats, but I tend to find now that I mainly paint from grey or brown. This primer is inexpensive and provides very good coverage.
Halfway through the undercoating process I remembered that Mick had sculpted two rooves for the entrance porch of the farm: a more traditional sloped roof that was present during the Battle of Waterloo, and the unusual octagonal tower that was built after the battle and still exists today. Mick wanted to be able to show either version on his display model, so I took some time drilling the model and adding rare earth magnets for this purpose. I did manage to accidentally get the wrong polarity on the magnets first time around, but fortunately Mick had sent me two models so I was able to substitute. A valuable learning experience!

Once dry, it was time for the main terracotta colour of the bricks. The colour I used was Winsor & Newton Galleria Burnt Sienna. I’ve tried several paints to get the right colour for bricks, but this is the best terracotta colour I’ve found. I watered it down about 50% and painted onto all of the bricks, avoiding rooves, doors and windows.
Once this was try, I mixed an approximately 50:50 mix of Vallejo Game Color Plague Brown with Model Color Deck Tan, although any light, warm yellow would do. I then lightly drybrushed all of the brickwork in order to lighten the model and add definition to the brickwork. Once finished, I painted all of the doors and lintels Model Color Saddle Brown, and the windows Games Workshop Caledor Sky, with dotted highlights of Teclis Blue in the top right hand corner of each window (again, there are Vallejo blues that could be used).
I then touched-up the grey of any of the rooves that I’d gone over before highlighting them with a drybrush of Model Color Light Grey. I also painted the flat roof of the tower Molor Color Natural Steel. I assumed that the flat roof was probably clad in lead during this period, but I have no documentation to support this! Once dry, I gave all of the rooves and woodwork a wash of Winsor & Newton Nut Brown – a magical substance that it perfect at giving definition and shading at this scale!

At this stage, the buildings are finished! Now it is all about the basing. This is an important feature in 6mm as it becomes an integral part of the model. For the base I used Vallejo Grey Pumice and mixed in approximately 50% of a dropper bottle of Vallejo Game Color Charred Brown. The pumice is great stuff – it is grey to start with, but dries fairly translucent and therefore any colour you mix into it comes through nicely, and can be shaped to some extent. It is also quite flexible when dry, can be cut with a scalpel and doesn’t warp bases. I applied a coat to the entire base. It has the additional benefit of acting like a mortar when dry, so I could position the buildings where I wanted them whilst it was wet and knew that it would hold them in place – a big advantage over gluing them in place and having to carefully get basing material around them! I then added some find sand, the intention being that this would represent well-travelled areas around and within the farm. However, I forgot to bed this in properly into the pumice, so most of it fell off when I was finishing off the base!


It usually takes about 24 hours for this to dry thoroughly. Once dry, it was highlighted with a drybrush of Model Color US Field Drab, followed by a very light drybrush of Games Workshop Rakarth Flesh, and edged the base with Charred Brown. I then used PVA glue to apply very light and light green flock. Once dry, I superglued down clumps of foliage and flowers. The entire model was then sprayed with Testors Dullcote.
I hope you like it!


